I just finished my very first Honour mode run in Baldur’s Gate 3. I have been playing this game for the last 2 months like a crazy person. I have enjoyed the game so much, I wanted to try the hardest mode (Honour) where you get one chance and if your party dies, then it’s game over. There’s no do-over, no reloading from a previous save point. It was a very stressful and anxiety-inducing few weeks, but in the end it was very satisfying and rewarding getting that sweet golden dice. This post is a reflection on my experience, learnings and a few tips and tricks I picked up along the way.
Run highlights
It was a Dark Urge resist run. And this was my second attempt at Honour mode. My first run ended in a very hilarious and heartbreaking way (more on this later). But the second attempt was more or less perfect. The builds were so optimized and powerful, I was never once in any real danger in any of the combats. Here are some highlights:
Final boss fight:
- Party level: 12
- Finished it off with two aberration slaying arrows. Used luck of the far realm critical hit on the first arrow doing 364 damage. Second arrow was enough for the remaining 86 (it probably dealt more damage but I forgot to check the logs).
Orin Duel:
- Level: 11
- Build: sorcadin (6 paladin, 5 sorcerer)
- Took 1.5 turns. I took 19 damage from Orin’s turn. 3 divine smites on the first turn (two normal attacks and a level 4 divine smite on each, then a quickened booming blade + level 4 divine smite on it as well). I forgot to use my luck of the far realm, but did a natural crit :D
Act 2 boss (Myrkul) fight:
- Party level: 9
- Took 1.25 turns.
- Party comp: sorcadin (6 paladin, 3 sorcerer), bardadin (2 paladin, 6 sword bard, 1 sorcerer), storm sorcerer (2 tempest cleric, 7 storm sorcerer), stealth archer (5 ranger, 4 rogue).
- Bardadin had the doom hammer in case I couldn’t finish early, which would’ve stopped the healing. Sorcadin had Blood of Lathander which blinded Myrkul/necromites giving disadvantage on their attacks; it also synergizes with callous glow ring.
Inquisitor and 4 githyanki in the chamber:
- Party level: 8
- Took 1.5 turns. Inquisitor was done the first half turn.
- Party comp: sorcadin (6 paladin, 2 sorcerer), bardadin (2 paladin, 6 sword bard), stealth archer (5 ranger, 4 rogue), open hand monk (6 OH tavern brawler monk, 2 rogue)
Hag:
- Party level: 5
- Took 2 turns.
Grym:
- Party level: 4
- Took a while but party took zero damage. iykyk. Hint: books and shoes.
Lessons Learned
Ungroup often, especially when looting and/or exploring. Some places have traps, smokepowder/oil barrels or other hazardous elements. If something goes wrong (for example failing to disarm a trap which triggers an explosion), your entire party won’t be harmed/killed costing you the Honour run. This is how my first run ended: we were near smokepowder barrels with the party grouped, which resulted in an instant total party kill and game over :(
Prep is the key. Understanding the legendary actions, possible actions/reactions, and battlefield positioning will make the run easier and more likely to succeed. I spent a lot of time reading the bg3 wiki to know about each boss fight, legendary actions etc.
Things will go wrong, always have a backup plan. Having a stock of invis potions helps with fleeing combat, regrouping/healing and trying again. Having an exit strategy/pathing is always a good idea.
Risk mitigation should be the top priority: There are some dice rolls that are essentially very risky and because you can’t reload a previous save and try again in Honour mode, if things go bad (and they often will), you gotta deal with the consequences. So try to mitigate the RNG factor as much as possible. If you are making a persuasion/deception skill check, make sure you are ready to deal with the consequence if it fails.
Funding the campaign is kind of harder in Honour mode compared to lower difficulties. Vendor prices/markups are 3x higher. Camp supply per long rest costs 2x. Two things help here:
- Have a dedicated trading hireling/character with high charisma/persuasion value. This would reduce the pricing/markup.
- Bribe vendors to boost their attitude and reduce prices even more. Level 1 is the best level to bribe as it costs 400 gold to boost attitude to 100. At higher levels, it costs more gold. So ideally you will have a hireling (I had a bard with maxed out charisma and persuasion bonus), and every time I needed to bribe a trader, I would go to Withers and respec which turned the hireling into a level 1, go back to the trader and bribe 400 gold, then level up and do the trading. Also, if you are close to level 4/8/12 and have some stuff to buy/sell, wait for the level up, then take the ASI feat to boost charisma; you will get more out of the sale.
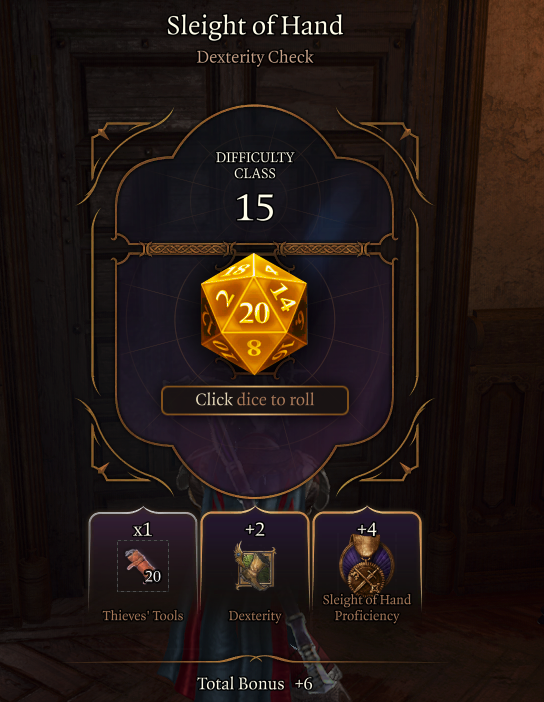
- Exploit: There are exploits for gold, but I couldn’t make most of them work except one. And it’s arguably the safest. I don’t want to spoil anything, so I will just say two words: Volo, pickpocket. For successful pickpocketing consider the following items: Gloves of Thievery, smuggler’s ring. Casting guidance and using a rogue character with high sleight of hand proficiency will make it easier. It’s a bit cumbersome though.
Initiative is the most important thing to prioritise. Alert feat, bow of awareness, hellrider longbow, sentinel shield and any other gears/items that increase initiative should always be your number 1 priority in Honour mode. 8-10 is a good range for initiative for most of the game, except for a few enemies that have very high initiative and can one shot a character. So prep for those encounters. Elixir of vigilance gives a +5 temp initiative boost should you ever need it.
Critical hit protection should be the next priority. Critical hits are lethal, especially in the early game. There are items that give protection from critical hits. You want to collect and distribute them appropriately to your party.
- Early game: you can obtain two adamantine items as early as level 3-4 if you know what you are doing. While there you will also get a helm that gives crit protection. So look for these three items. But be careful, I wouldn’t suggest attempting this so early in case you don’t know the mechanics.
- Late game: There’s a helm that you can obtain without any fight. Again, be careful, the “no fight” thing is only applicable if you know what you are doing.
Party/Character building principles
- There are builds that are stronger early game but don’t necessarily scale proportionately as the game progresses. The opposite is also true for some builds. Some builds only come online mid/late game and they will have a very hard time in the early game. You want to avoid the late bloomer. Act 1 is probably harder because in general the characters/party are less powerful and have less HP. So having as much early power as possible will make your life easier.
- Ideally, you want to have builds that are somewhat powerful early and scale proportionately as the game progresses.
- Even though at any given moment you can have at most 4 members in your party, I found having 5-6 properly built members helps. There are combats/situations where you want a melee-heavy party, and in some cases you want a caster/ranged-attacker-heavy party. Having access to diversified party members that you can swap out depending on the situation will make the campaign easier.
- High-charisma based characters are good for the party face, as you will most likely roll a lot of persuasion/dialogue checks with them. Classes that have high charisma: paladin, sorcerer, warlock, bard.
- Multiclassing early should be avoided. It will delay important capstones like getting feats, extra attacks etc.
- No build should be set in stone. You should be prepared to change and swap items/gears depending on the situation. Also, it’s very important to understand the build rather than just following some templates.
- You want a diversified mix of melee, ranged and caster party members. You want the ability to crowd control with area of effect spells (typically handled by a control/caster character) as well as melee characters who can attack and burst down single high-value enemies. It’s not ideal to have two of the same class/type of members as they will often compete for gears and essentially perform the same role. And like I said, you want diversity in your party.
- Your whole party should work in synergy. Actions and capability should be spread out and built across party members. For example, it’s unnecessary and suboptimal to have two characters with the same control spell. You are essentially missing out on a different spell/capability as spell selections are limited.
Interesting discoveries
- Usually paladins have two attacks per turn beyond level 5. But if you multiclass into sorcadin (paladin-sorcerer), you can use a sorcery point to do an extra booming blade attack because booming blade is categorized as a cantrip. You can divine smite on booming blade as well, making paladins deal three attacks/divine smites per turn. (Obviously you have to have sorcery points and metamagic, which I believe you get at level 2 sorcerer, so essentially you get this capability after taking at least 2 levels of sorcerer.)
- Potions of angelic reprieve are awesome. You can essentially have a crazy amount of spell slots/sorcery points. Try to hoard as many of these as possible.
- Exploits: There are exploits regarding infinite sorcery points and spell slots. I tried them, they work. But they are a bit cumbersome. Hoarding potions of angelic reprieve is highly useful if you have a lot of casters in your party. For the final fight I had about 30 sorcery points and 20 spell slots on my caster :v
- The tavern brawler feat is absolutely awesome, especially for unarmed/throw attacks. Builds that can take advantage of this are monks and throw barbarians.
- Slashing flourish is low key awesome. I have never played a bard before, but the flourish was a cool revelation.
- Buy the Shadeclinger armour and drakethroat glaive. The armour gives a buff that offsets the disadvantage from risky ring. Drakethroat lets you add a +1 bonus to attack roll and 1d4 extra damage with titanstring bow (potentially one more weapon if you twin cast).
My party Builds
In general, I used strength elixir throughout the playthrough. I find it better not to spend any ability point on strength as strength elixirs are very easy to stock up and use. It also solves the MAD(multi-attribute-dependent) build problem.
Items and gears, I swapped around a lot. But I will mention the core ones to convey the idea.
Dark Urge: Sorcadin
- 6 levels of paladin + 6 levels of sorcerer: a 7-5 split (7 paladin, 5 sorcerer) is also a valid idea, but level 6 of paladin gives aura of protection which helps with saving throws, so I stuck with 6-6.
- Attributes:
- Strength: 8
- Dexterity: 14
- Constitution: 16
- Intelligence: 8
- Wisdom: 12
- Charisma: 16
- Feats: Alert, Savage attacker
- Fighting style: Defence (for +1 to AC)
- It was mostly a sword and shield build. I wanted to prioritize high AC and tankiness.
- Act 1 gears: dwarven splint armour, safeguard shield, Phalar Aluve longsword.
- Act 2 gears: armour and shield unchanged, ring of free action and callous glow ring, replaced Phalar Aluve with Blood of Lathander.
- Act 3 gears: armour of persistence, boots of persistence, legacy of the masters gloves, callous glow ring, strange conduit ring, Ketheric’s shield.
Shadowheart: Gloom Stalker Assassin Stealth Archer
5 levels of gloom stalker ranger + 4 levels of rogue assassin + 3 levels of (champion) fighter
Honestly this is the GOAT of builds. This was developed by Morgana Evelyn and all credit goes to her. You can read more about this build here.
The only thing I changed from the build guide was that I swapped Constitution and Wisdom scores. I used 16 for con and 14 for wis. The idea of higher wisdom is: if you have the diadem of arcane synergy, it adds the wisdom modifier to any weapon damage. But I was nervous about lower con, which affects HP. So I sacrificed +1 to weapon damage for +1 to con. But in retrospect, I didn’t really need that higher HP. So once again, the build guide is just perfect. You can just follow it blindly. It’s that good.
Also this build got the Hag’s hair for +1 to dexterity.
The above two were my core party. They were always constant in the party. The remaining two members were picked out of the remaining builds depending on the situation
Karlach: Tavern brawler Open Hand Monk
- 9 levels of Open Hand Monk + 3 levels of Rogue thief
- This is the least demanding character build. Monks don’t necessarily need any gears, armours or even weapons. And they consistently hit hard throughout the game.
- Not to mention, stunning strike and flurry of blows (topple or stagger) entirely disable legendary actions when landed. I am very impressed with monks. This build trivialized most of the early game boss fights.
- I collected a bunch of soul coins, which is a Karlach-specific buff. But I was saving them for harder fights and never really used them. They add 1d4 extra fire damage. (I read soul coins are bugged and they actually deal 2d4 instead of 1d4, but alas I never found out.)
- The only gear I would mention: I used bracers of defence which gives +2 to AC provided you are not wearing any armour or wielding a shield.
Lae’zel: Up until early/mid game, I had Lae’zel as a tavern brawler throw barbarian with the returning pike. Throw barbarians are very strong early game. They do a crazy amount of damage. But I respecced her as a bardadin (2 paladin, rest levels into bard) from level 8 onwards, essentially taking 2 levels of paladin and 10 levels of sword bard.
My reasoning was that bards early game are not very powerful. They get extra attacks at level 6, which is 1 level later than most martial classes. And at level 5 I did most of the difficult Act 1 boss fights. I wanted to have the absolute best composition I could have at level 5. Hence, throw barbarian.
But from mid to late game, bardadins are an absolute powerhouse. They are full casters, meaning they get the same spell level/slot progression as other caster classes. On top of that, sword bards are essentially martial characters. Meaning you get the best of both.
Also, taking two levels into paladin gives you smites. With bards’ high spell slots, you essentially have a crazy amount of smite capability. And of course you get to do crowd control with spells should the need arise. Honestly this is very powerful.
For gears, I used gloves of dexterity to have 18 dex without having to spend ability points, which I instead spent on Constitution (16) and Charisma (16). Also there are a few gith-specific weapons like the soulbreaker greatsword or the silver sword of the astral plane. These deal extra damage when wielded by a githyanki. It perfectly fits with Lae’zel.
Feats: Alert, Savage attacker
Gale: Ice sorcerer. But I only used him in two or three fights.
- My plan was to use the potent robe for this build and have the ultimate crowd control/caster party member. But the potent robe is locked behind a (potentially very) risky Act 2 quest. Not to mention, there are certain things that need to go a certain way in Act 1 for you to even get this quest. Also as a Dark Urge, it’s significantly harder to progress this questline. I won’t spoil it, but let’s just say, you can’t have the robe if the person who gives the robe is murdered by the Dark Urge in their sleep :v
- I eventually did manage to progress and complete this questline and got the potent robe. But I did the quest somewhat late (around level 8) and by that time I had built and used a different version of caster build, which I quite liked. So I stuck with that. Sorry Gale.
Min****a: Storm sorcerer (2 tempest domain cleric + 10 storm sorcerer). [Name is masked, as it might be a spoiler in case you don’t know this person could even be recruited as a companion. But iykyk]
- The coolest thing about this build is that it’s a caster build with heavy armour and shield proficiency. Meaning you get to have a spellcaster who is not squishy.
- Also storm sorcerer gets the most number of known and high damage spells. For example, I absolutely love the sleet storm spell. Storm sorcerers get this without having to choose it as a known spell.
- Gears: Birthright hat (+2 to charisma), sentinel shield (+3 to initiative) in Act 2 and Viconia’s shield in late game, adamantine splint armour (crit protection), necklace of elemental augmentation (extra elemental damage), snowburst ring (extra cold damage), Winter’s Clutches.
- Feats: ASI, Alert
For the final and most other mid to late game fights, I took Durge, Shadowheart, Lae’zel and Min****a in my party, as I felt this was the most balanced party.
Game mechanics worth being aware of
- Attack rolls and damage rolls are different. The first one determines whether the attack will hit or not. The second one determines how much damage it will deal provided the attack roll was a hit. Both are d20, meaning you will roll a 20-sided dice.
- Attack/hit chance mechanics: broadly, if you are attacking an enemy with 10 AC, you need to roll 10 or higher on your attack, meaning at base you have a 50% chance to hit the enemy.
- Attack roll bonuses: typically you will have bonuses that will add to your attack rolls. For example, if you are doing a melee attack and have 16 strength (+3 modifier), that means you will have +3 to your attack roll. So going back to the previous example, you will need to roll 7 or higher and your hit chance increases from 50% to 65%. So boosting bonuses to attack roll is crucial.
- Damage roll works in the same way as above, but it only procs when the attack roll is successful.
- Balancing attack and damage roll bonuses should be your ideal goal. If you only focus on gears/items/feats that increase damage (for example, great weapon master or sharpshooter feats increase damage but deal penalties to attack roll), that will make you miss more often. Having somewhat consistent damage is better IMHO. I mean don’t get me wrong, you will miss every now and then as it’s RNG. But hitting 3 attacks with moderate damage is better than hitting 1 attack with high damage.
- Things that add bonuses to/improve attack roll:
- Oil of accuracy: adds +2 bonus.
- Bless: adds a 1d4 bonus. You can equip the whispering promise ring and drink a healing potion at the beginning of your turn which will give you bless without having to spend an action.
- Risky ring: rolls two dice and takes the higher value.
- There are a lot of items/gears that add flat bonuses. For example, gloves of archery adds a +2 bonus to ranged attack rolls. Same for mask of soul perception, which adds +2 to all attacks (ranged and/or melee). Look for this kind of items/gears. There are too many for me to mention here.
- Critical miss/hit: If you roll a 1 on your attack roll d20, it will always be a miss no matter how much bonus you have from other attributes/items. Similarly, if you roll a 20, it will always be a hit, and on top of that the damage roll will be doubled in this case.
- Depending on attack type, different attributes will be used for attack roll bonuses:
- Ranged attack (arrows, throws): They will use the dexterity attribute modifier. (There’s a caveat but this is in general.)
- Melee attack (swords, staffs): They will use the strength attribute modifier. (Again, there’s a caveat but this is in general.)
- Spell attack: Spells will use the spellcasting ability as modifier bonus. Spellcasting ability is different for different classes. Sorcerers, paladins, warlocks use charisma as spellcasting ability. Rangers, clerics etc will use wisdom. Wizards will use intelligence.
- Saving throws and Save DC (difficulty check): Some spells require the enemy to do a saving throw to determine whether it will hit or miss. For example, the hold person spell requires a wisdom saving throw. Meaning, the person who is casting the spell will force a save DC (determined by the spellcasting ability modifier and other bonuses if any) and the enemy will have to roll a d20 plus any wisdom bonuses. If they roll lower than the save DC, they will be affected by the spell. If they roll equal or higher, then the spell will miss. So tldr, for a spellcaster character you want to improve the save DC.
- Armour class: Armour class (AC) will determine the number enemies would need to roll to hit. Generally you want higher AC on melee characters who will tank the frontline, whereas squishier characters (like spellcasters, rangers) will remain on the backline. But the way the game works, enemy AI will target party members with lower AC. You can use this to your advantage. For example, you can protect your highest damage dealer by placing a lower-AC character next to them acting as a meat shield. The lower-AC character will take the hits and protect your highest damage dealer. Although there’s an element of RNG involved here, you can’t always guarantee this meat shield strategy will work. But it mostly works.